Showing posts with label DIY Projects and Home Decor. Show all posts

Tuesday, July 30, 2013

Clothespins Aplenty

The Multipurpose Clothespin
We have a fondness for clothespins! For fun my daughters and I have even decorated clothespins.  Lately I seem to see one on every surface and around every corner in our home. My favorites are the old, weathered-wood peg style clothespins. 
One-piece wooden clothes-pegs were invented by the Shaker community in the 1700s.
The first design resembling the modern clothespin was patented in 1853. 
What can a humble, little clothespin do?
Prevent spoons from getting lost in the soup pot.
Hold rubber bands,
recipes, or old supermarket sales signs - 
Imagine that!  $.47 cents for a bag of potatoes! 
Hang special papers inside a kitchen cabinet. 
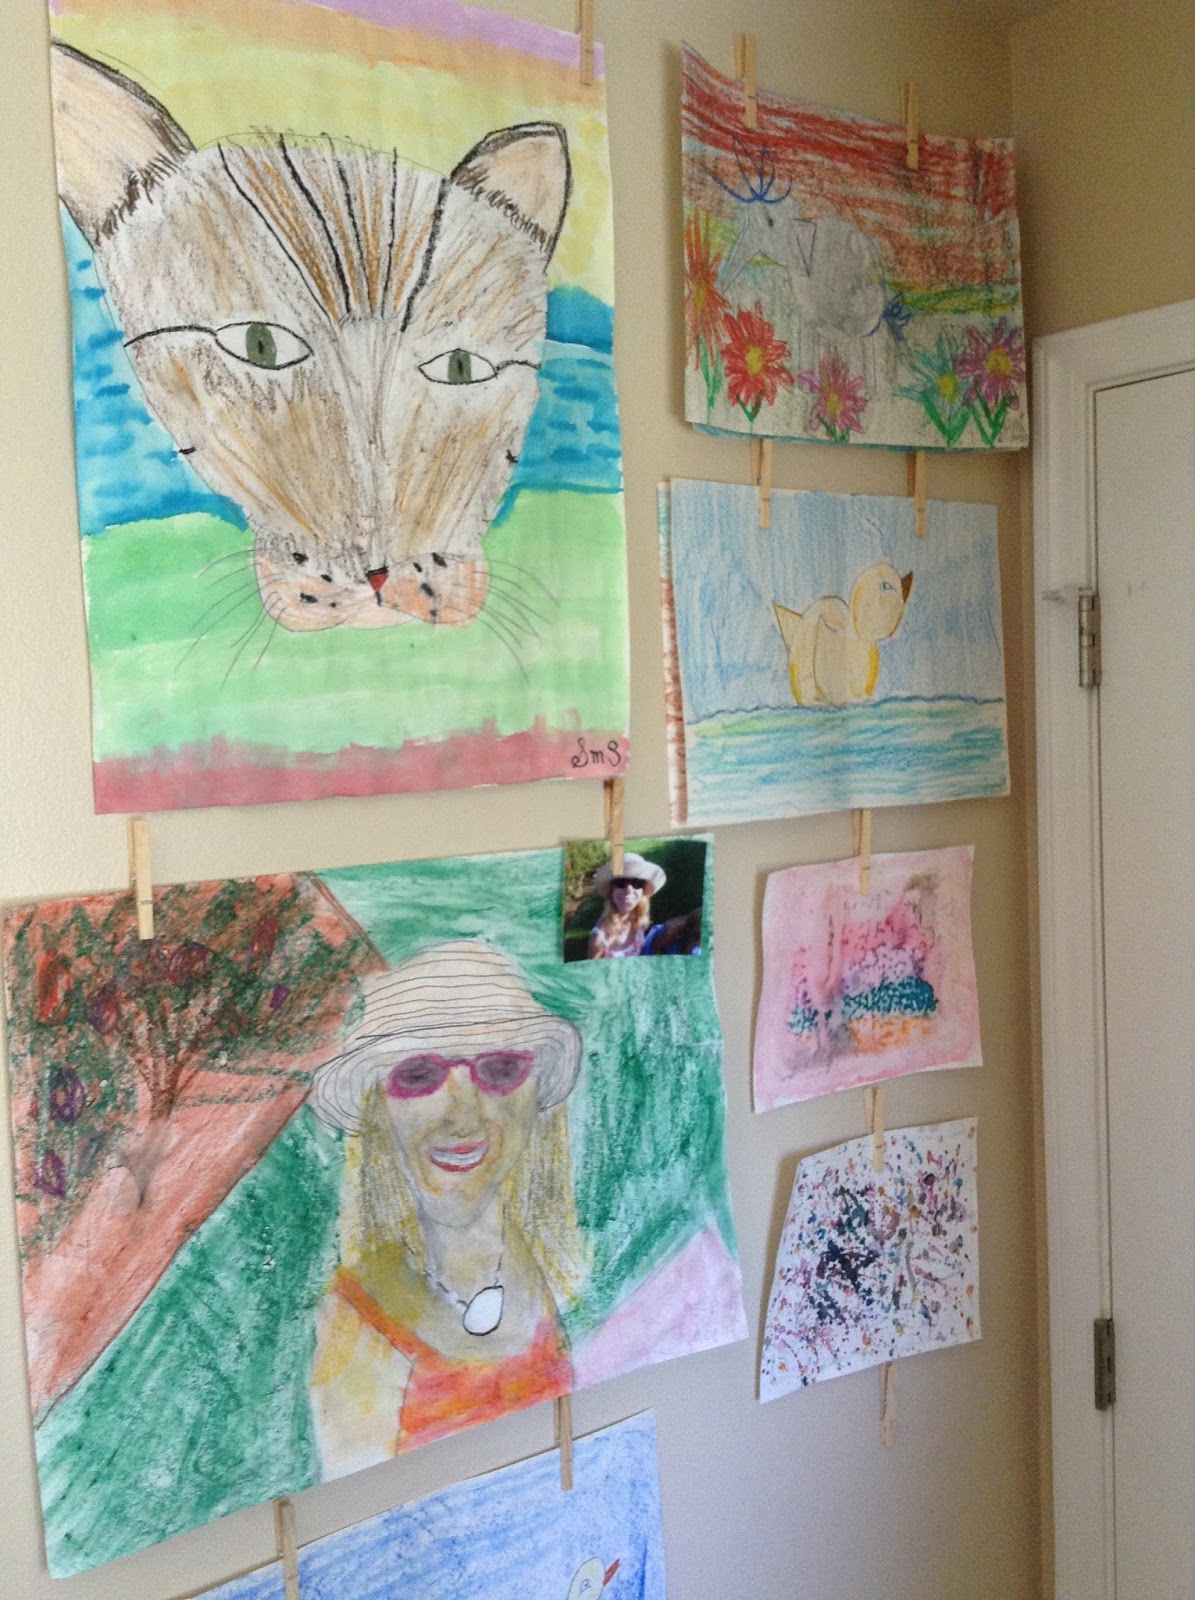
(see my post Displaying Art for a How To on adhering clothespins to walls)
Hang children's art.
Organize paper stuff like "to do" piles.
Seal open packages.

Wish Happy Birthday.

Make lunch or gift bags a bit more fun.
Become animal legs,

big and small.


Celebrate Christmas,

Valentine's Day,

or spring.

Instead of laundry on the line, pictures on the line.

 Peg type pins disguise as Mary and Joseph.
Look pretty packaged for gifts.
Decorate a Clothespin "How To"...
Supplies
Clothespins, glitter, Mod Podge, Foam paint brush, scissors, paper cutter, paper, adornments - (flowers, plastic insects, buttons, seasonal items)
How To:
Simply paint one side of the clothespin with a light coat of Mod Podge.
Then  
Sprinkle on glitter, allow to dry, then repeat on the other side. 
OR
Adhere paper strip (cut to clothespin dimension before gluing) to the clothespin. When dry, apply one more thin coat of Mod Podge. Repeat on other side.
OR
Use a small amount of hot glue to glue on adornments. 


Sunday, June 30, 2013

Displaying Art

Create an Art Gallery
Yes, that is a toilet!  I am inviting you into our bathroom!  The bare walls in this bathroom were calling for a little fun!  Welcome,  Art Gallery!!!  The bathroom, or powder room (this one does not have a tub or shower which would bring unwanted moisture), is the perfect place for displaying art!  The bathroom is frequently visited, lengthy visits are sure to encourage earnest viewing,  and admiring  children's creations makes this mommy smile!  Smiling is good!  As children head into middle or high school, a bit less art is created, so savor their masterpieces now (and then) and encourage yours to create an Art Gallery on those walls calling for a bit of fun!
How to...
 Hang art high, low, all around, or
 even behind the door (that is ME!, by Bella)!
Supplies:  
Clothes Pins (40 for $1.00 at dollar stores), 
Command Strips (available at craft and hardware stores), Scissors
One box of these Command Strips 
will allow you transform every room into an art gallery!
Cut the double-sided strip vertically.  
It says on the strip which side adheres to the wall.
When deciding where to stick the clothespins, clip the art work on the clothespin before you remove the adhesive, determine spacing, and then stick it proportionally.  We tend to use 3 different paper sizes, so I have clothes pins spaced accordingly.  We either change out the art with a new masterpiece on the same paper size or put up more clothespins!  Watching the wall grow is exciting!
It really is as easy as it looks!
I did remove clothespins that were stuck on the wall and found no damage to the wall or paint!
While you are at it, capture the artists in action!
Julia seemed so big to me at the time and now, 8 years later...
so big!
Let me know where you hang your art wall!

Thursday, June 27, 2013

Button Paperclips

Buttons!  Buttons!!  Buttons!!!  
Interesting Information...
Over 3,000 years ago, during the Bronze Age, the first buttons, fashioned from bone, horn, wood, metal or shells, were used for decoration.  Functional buttons with buttonholes for fastening or closing clothes appeared first in Germany in the 13th century.
Buttons Continue to be a Big Part of My Life!
When my daughters were younger they would string, count, sort, and glue buttons to create art masterpieces!  We read stories about buttons - we LOVED reading CORDUROY, (the bear whose button goes missing) by Don Freeman!  We sewed buttons on dolls and clothes.  We have quite a collection and continue finding purposes for these little gems!  Our latest project, attaching buttons to paper clips.
So many textures, sizes, colors, designs!
Great page markers! (Great book, too!)
Useful for all ages! (Another must read!)
Organize important papers, like Julia's art.
Package in cellophane for gifts!
How to...
Remove shank with a "Shank Remover" available 
at fabric or craft supply stores.
Arrange clips so they are uniform, on a firm card.
Cut corresponding felt squares or circles.  

Sandwich paperclip between button and felt 
with a small dab of hot glue. 
Create a patriotic theme!  
We will give a these to our visiting students, staying with us from Taiwan!

Sunday, June 16, 2013

Fabric Strip Banner or Window Decor

Fabric Strip Banner


Banners have been a favorite of mine for a long time (emphasize long!).   I began with paper style banners, then switched to fabric, added in yarn, and am still not done with the whole banner idea!  Now I am going for a peaceful look to act as a window valance in my daughters' room.  I do not want to put up curtains or shades, but their windows looks like a big, black holes at night. I think this might soften up the windows at night, yet not take away light or views during the day!
 Supplies:
Fabric, Rotary Cutter (optional, but a time saver), ScissorsCutting Board, 6/32" Cotton Filler Cord (or any size piping for pillows, twine, rope, or string),
and a good book on tape or movie!
Fold the fabric to the desired strip length.  Mine ranged from 37 to 40 inches, depending on the bolt dimensions.  Cut strips about 1-2 inches wide (your preference).  Exactness is not necessary!  Cutting outside is, however!  Fabric fibers will rampantly shed!!  Plan on using 11/2-2 yards of fabric per 1yard of completed banner.  I wanted mine to be really thick.  Measure space and buy accordingly.  I got lucky, as I hit a 50% off sale on all linen fabrics at Joann's!!!  It is hard to see, but the blue stripe has a thin metallic sparkle running down it, one white is shimmery, and the flax color has subtle gold flowers.  I love the natural colors with just a faint bit of sparkle and shimmer!  They are feminine and pretty!  

Keep your fabric strips sorted separately.  
Turn on some entertainment and have fun tying!  
Tips:
Tie cord between chairs, take a seat between, start knotting!
When tying your simple knots, pull loosely to prevent excess fraying.
Decide how you place your fabric strips.  Randomly?  In patterns?  
I avoided patterns and went for clusters of my four white tones and randomly threw in the blue strips.  I thought the blue may overpower the whites, so I used fewer blues and just tied them on here and there.
Leave enough filler cord on the ends to tie slip knots for hanging.  Hang up your masterpiece!  I hung mine quite high, nearly to the ceiling.  Twine a few fabric strips on the ends to hide the cord.  
I left my ends uneven, but trimmed a few threads.
Stand back, admire, and add or subtract some strips.  
Tranquility!
Our college friend, Amber, inspired me with this style.  She used 3 fabulous, cheerful, colors to liven up her dorm hallway.  I wish I had a picture to share!  This technique would be perfect for needed privacy on a bathroom window, on any window where you wish to hide a rolled up shade or undesirable view, or simply tied from the tree limb to limb!  
Happy creating!